
Boot and Setup Raspberry Pi
To gain access to the Pi, you can use either of the two methods listed below:
-
Desktop Mode: This is when you want to use the Raspberry Pi as a regular desktop computer. Here, you'll need accessories such as a monitor, keyboard, and mouse.
-
Remote Access (Headless Mode): If you don’t have access to the peripherals listed in method 1, you can log in remotely to your Pi using your PC.
1. Desktop Mode
Needed devices include:
-
Raspberry Pi Board (Pi 3,4,5, etc.).
-
Keyboard (connected via USB to the Pi).
-
Mouse (connected via USB to the Pi).
-
HDMI Cable (compatible with the Pi model you have).
-
Monitor screen (connected via HDMI to the Pi).
-
Power plug.
You can also use a Raspberry Pi 500 - This is a Raspberry Pi computer built into a keyboard.
.jpg)
TecnoHub
Raspberry Pi Desktop Setup
2. Remote Access - Headless Mode
Sometimes you need to access a Raspberry Pi without connecting it to a monitor, keyboard, and mouse. Perhaps the Raspberry Pi is embedded in a robot or mounted in an inconvenient location. Or maybe you don’t have a spare monitor - this is where the ability to wirelessly connect to Pi comes in handy.
To remotely control your Raspberry Pi from another device like your PC, use one of the following services:
-
SSH
-
VNC
-
Raspberry Pi Connect
NOTE: SSH and VNC only work on the same network, i.e., your PC and your Raspberry Pi must be connected to the same router or hotspot. But the Raspberry Pi Connect can work over the internet (meaning you can access your Pi from anywhere)
Before you can remotely connect to a computer or device on a network, you need to know the device's IP address. One way this can be done is by using software like Angry IP Scanner.
Angry IP scanner
This is a fast and friendly network scanner for Windows, Linux, and Mac. It is very extensible, allowing it to be used for a very wide range of purposes, with the primary goal of being useful to network administrators. Download
-
Connect your PC to the same network your Raspberry Pi is connected to, then launch Angry IP Scanner.
-
Click Start on the IP Scanner, wait for a little while and all the devices on the network should be listed with their IP address as shown below:

Now that we have gotten our Pi’s IP address, we can remotely connect to it from our PC using any of the previously listed methods:
SSH
Secure Shell (SSH) is a protocol used to securely connect to and manage remote computers and devices over a network. It provides a secure channel over an unsecured network by using encryption. SSH is widely used for system administration, network management, and secure file transfer.
SSH is pre-enabled with the Raspberry Pi.
There are a variety of software that can be used for SSH remote communication, but we will make use of PuTTY in this course.
PuTTY – PuTTY is a free and open-source terminal emulator, serial console and network file transfer application. It supports several network protocols, including SCP, SSH, Telnet, Rlogin, and raw socket connection. It can also connect to a serial port.
Login Remotely to Pi using PuTTY:
-
Launch PuTTY on your PC and you should see the screen below:
-
Copy the IP for your Pi from Angry IP Scanner and paste on PuTTY.
-
Ensure the protocol is set to SSH and the port number is 22, then click “Open”

You should see a black terminal screen: login with the username and password you set while installing the Pi OS to SD Card (in this case: username: pi and password: raspberry)
-
Type the username first and press “Enter”.
-
Next, enter password the click “Enter”. (the password will not display while you are typing for privacy reasons - so ensure you’re entering the correct password)

Now, we’ve successfully logged into the Raspberry Pi 5. Next, we need to update our Raspberry Pi OS using the commands below:
sudo apt-get update
Once the update command is successful, run the next command below:
sudo apt-get upgrade
Once the upgrade is complete, now its time to configure the Pi to activate VNC so we can now use the full desktop GUI of the Pi OS since PuTTY on gives us access to the Pi only through a terminal window.
Enter the following command on the PuTTY terminal, then click “ENTER”:
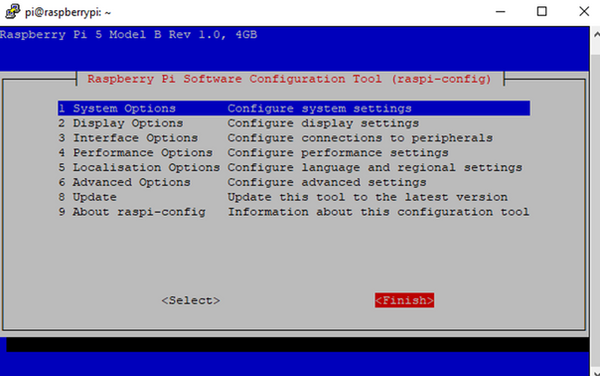
sudo raspi-config

You should see a screen similar to the one below:
-
Use the “Down Arrow Key” to move red ribbon to option 3 as shown then click “Enter”:

-
Use the “Down Arrow Key” to move red ribbon to VNC as shown then click “Enter”:

-
Click “Enter” on “<Yes>:

-
Click “Enter” on “<Ok>:

Use the “Right Arrow Key” to move red ribbon to <Finish> as shown then click “Enter”:
We have now successfully activated VNC on our Raspberry Pi 5. Clicking Enter on <Finish> should take you back to the black Terminal screen.
Next, we need to reboot our Pi by typing the following command on the PuTTY terminal then click “Enter”:
sudo reboot

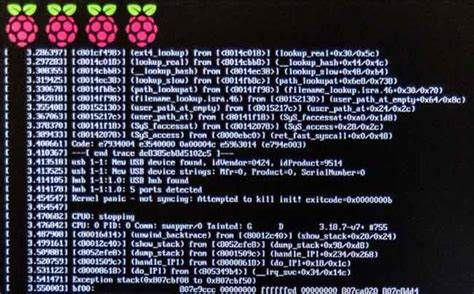
You should automatically loose connection with the Pi as it reboots (turns Off and back On) after a short while.

Virtual Network Computing (VNC)
Since PuTTY only gives us access to the Pi through the terminal, which is not very beginner-friendly, we need a medium in which we can have access to the full desktop Graphical User Interface of the Pi. That brings us to VNC.
VNC (Virtual Network Computing) is a graphical desktop-sharing system that uses the Remote Frame Buffer (RFB) protocol to remotely control another computer. It allows you to see and interact with a remote computer's desktop environment as if you were sitting in front of it. VNC is widely used for remote technical support, system administration, and virtual desktop infrastructure (VDI).
Key Features of VNC
-
Remote Access: Access and control a remote desktop from anywhere with an internet connection.
-
Cross-Platform: VNC servers and clients are available for various operating systems, including Windows, macOS, Linux, and mobile platforms.
-
Graphical Interface: Provides a full graphical interface, allowing for a seamless remote desktop experience.
-
Security: Supports encrypted connections to ensure secure remote access.
Setting Up VNC
To use VNC, you need to install both a VNC server on the remote machine and a VNC viewer (client) on the local machine.
Installing VNC on Windows
-
Download and Install RealVNC:
-
VNC Server comes preinstalled on Raspberry Pi OS and we activated it with PuTTY.
-
Install VNC Viewer on the machine you will use to connect to the remote machine.
-
-
Connecting with VNC Viewer:
-
Open VNC Viewer on your local machine (PC).
-

-
Click on “File” then “New connection”

-
Enter the IP address of your Raspberry Pi (the one we previously got using “Angry IP scanner”) and give your Pi a name (say: Raspberry Pi 5) then click “Ok” (You should see a new device icon).

-
Double click on the icon with the name you gave your Pi, and you should see a sign-in screen.

-
Input your Pi’s Username and Password. Click “OK” when you’re done and you should see your Raspberry Pi Desktop GUI:

